Serger threading can be difficult. While conventional sewing machines, use only two thread, sergers may use up to eight. Therefore it is much more challenging to thread than regular sewing machines.
Since the introduction of the home serger, users have complained about just how hard it is to thread. With multiple threads, needles, and strange looking gismos, it not only looks complicated, it is. It not only feels like you have to twist and turn just to thread it, it does.
Above the thread cones behind the machine, is a tall wire thread rack. The threads are drawn up and over the rack. They then are threaded through guides, tension assemblies, some more guides, and finally to their deliver device. It is so easy to get the threads tangled, that you really need to be alert.
The mechanism moves the needle down through the fabric and beyond. The thread from the needles is drawn through the fabric. The lower looper picks up the needle threads and moves to the right. The upper looper picks up the needle thread and the lower looper thread and wraps it around the stitch finger. This process is repeated again and again forming overlocking stitches around the edge of the fabric which trail along behind as the seam moves through the sewing machine.
Improper threading creates calamity. Slight variations in threading occur from one serger to another, but the basics are essentially the same. Always read and follow the user manuals instructions precisely.
While there are thousands of different models of serging machines, and each one has its own special way to do the threading process; they are all about the same.
Here are the essentials. First, lift the presser foot. To thread a serger begins at the thread spool. Each cone of thread is properly placed on its spool pin. Draw the thread up and over the thread rack. Draw the thread through each and every thread guide exactly as indicated in your users manual. Caution: threads often get caught on rough spots along the thread line. Double check that the thread flows smoothly off the spool and through the various guides.
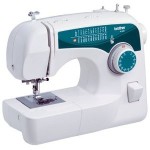
Sergers, Overlocks and more, all at AllBrands.com
Make sure the presser foot is lifted to release the pressure on the tension assemblies. The threads are then drawn through the tension discs. Most sergers and traditional tension based sergers have front mounted tension assemblies which may protrude from the face of the serger or be enclosed in the serger cover with only the adjusting dials protruding.
Inside the tension assembly are two round metal discs that are designed to press against each other with the thread between them. Make sure the thread has the proper amount of resistance when the presser foot is down.
Lifting the presser foot before you start thread, releases the pressure on the tension assemblies making it easy to thread them. Make sure each thread is drawn through the tension discs and held firmly in position. If the presser foot is down, the thread (can|may|will travel along the edgeof the tension discs instead of moving through them properly. The solution is: lift the presser foot lever when you start threading, and keep it up until you thread the needle.
Following the users guide, continue threading through each and every thread guide. Thread the upper looper first. Then thread the lower looper. Then thread the needles. Unless your users guide says otherwise always thread in this order.
Needles are the last things threaded. To do so make sure to thread all of the guides and take up lever leading to the needles. Since there are often more than one needle, it can be awkward to thread them without use of tweezers of serger needle threader.
Examine the tension with the presser foot still up by slightly tugging on the end of the thread. You should sense very little friction. Now drop the presser foot and check again. You should feel significant drag now. You can double check each thread the same way just to make sure that the thread is properly seated in their appropriate tension assembly.
If a needle breaks, unthread the entire machine, and rethread in proper order. If you need to change colors or thread spools, cut the thread just above the thread cone. After setting the cone in place, tie the new thread to the original thread using a very small knot. Gently advance the set of threads by slowly serging or by rotating the hand wheel until the tie off has passed beyond the thread finger. Take special care when the knot reaches it guide hole. This technique may be used for all or any one of the threads including needles and loopers.
Properly threaded sergers produce chain stitches, however, any errors in threading will result in faulty stitches and broken threads. After you thread the serger, go back and double check the entire thread line making sure that the thread is properly positioned. Look for any snags,wrapping, or twists in the thread. If you find errors, rethread in proper order until the threading is perfect.
We have thus far discussed traditional run of the mill sergers manufactured by most of the sewing machine companies. The things we have discussed here, however, to not apply to the serger technology leader Baby Lock. Baby Lock uses a revolutionary thread management system that eliminates the frustrations over serger threading. Place a quarter inch of looper thread in a small portal and press a lever. The looper is magically threaded. You can thread a Baby Lock in less than sixty seconds. It does not matter what order you thread either.
You can also follow me on Facebook.
I would appreciate it if you would Like, Share, and Tweet this post. Thank you!